- Download and install VirtualBox – https://www.virtualbox.org/
- Download Ubuntu 22.04 ISO – https://ubuntu.com/
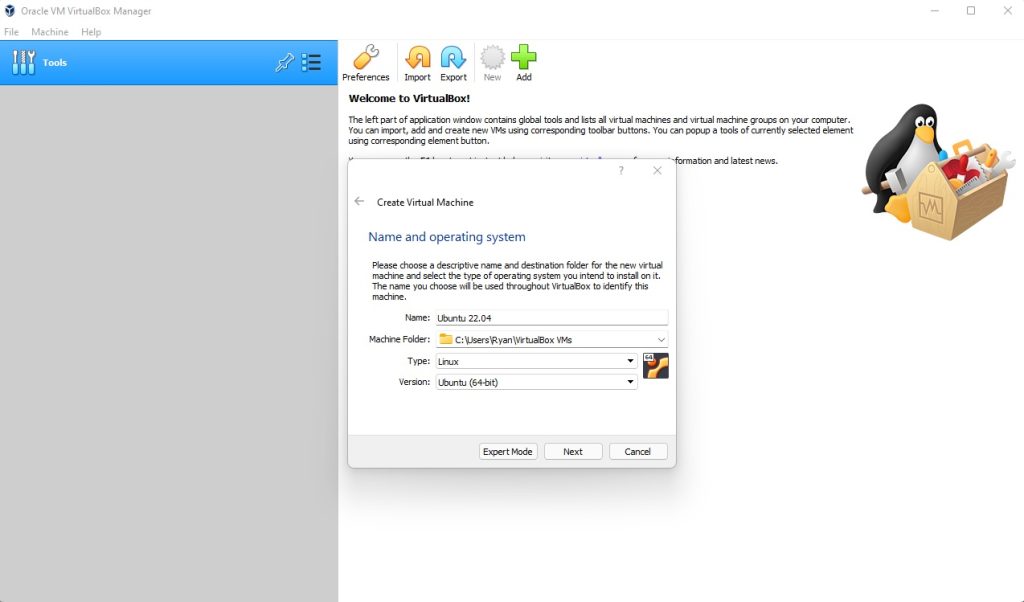
- Create a new virtual machine. Choose the name, VM install location, type Linux, version Ubuntu 22.04 64-bit, and click next
![](https://www.ryandoyon.com/wp-content/uploads/2022/04/VirtualBox-create-new-1024x602.jpg)
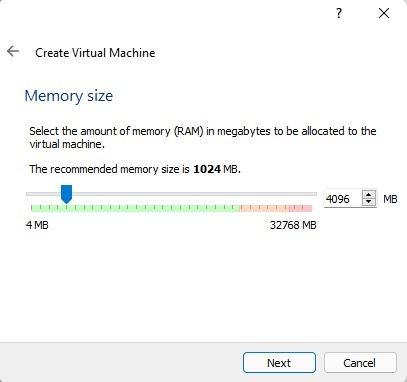
- Add the amount of memory you want to allocate for the VM to use and click next
![](https://www.ryandoyon.com/wp-content/uploads/2022/04/VirtualBox-Memory-SIze.jpg)
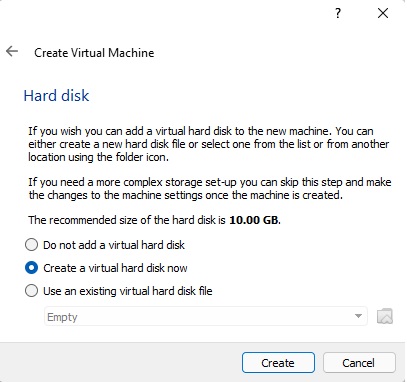
- Create a virtual hard disk
![](https://www.ryandoyon.com/wp-content/uploads/2022/04/VirtualBox-hard-disk.jpg)
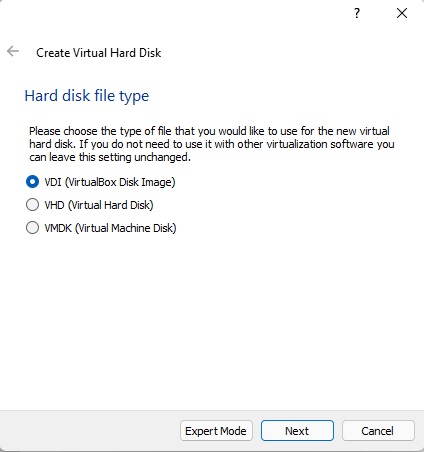
- Choose hard disk file type VDI and click next
![](https://www.ryandoyon.com/wp-content/uploads/2022/04/VirtualBox-Hard-disk-file-type-1.jpg)
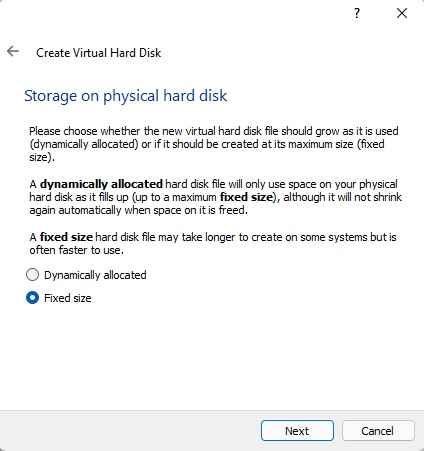
- Choose fixed size storage and click next
![](https://www.ryandoyon.com/wp-content/uploads/2022/04/VirtualBox-Hard-disk-fixed-size.jpg)
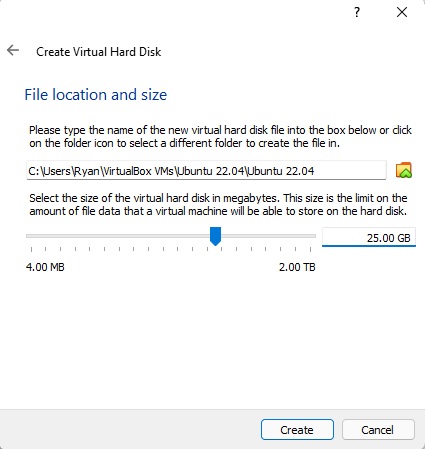
- Choose the file location and size of the virtual hard disk then click create
![](https://www.ryandoyon.com/wp-content/uploads/2022/04/VirtualBox-file-location-and-size.jpg)
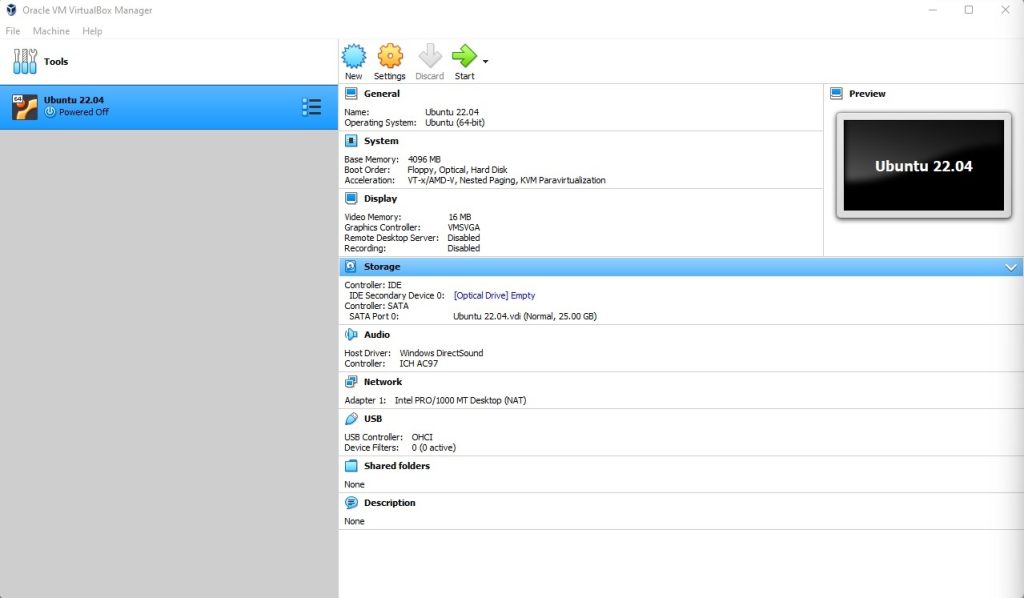
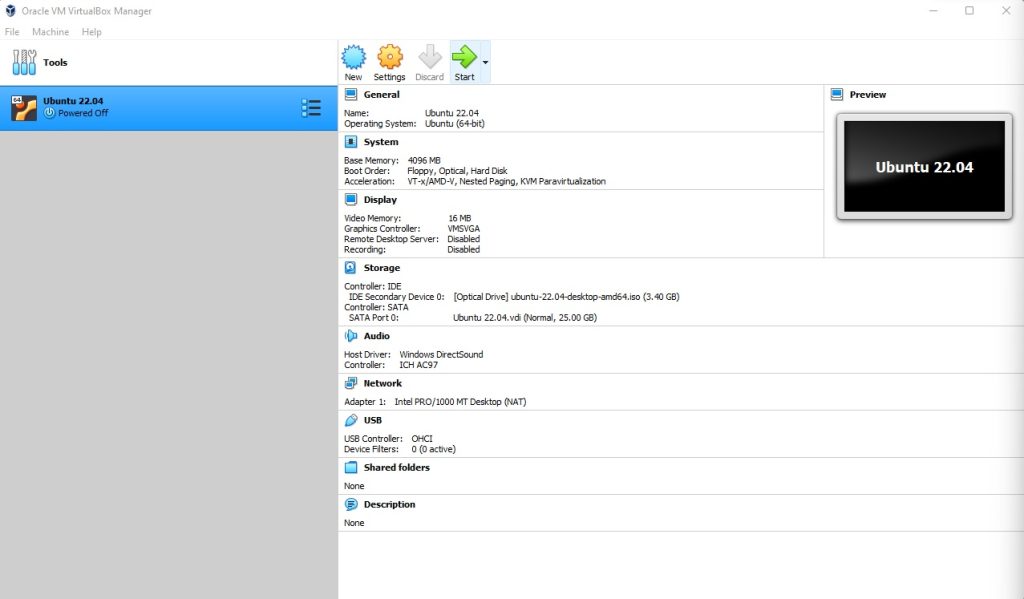
- Now that the VM has been created you need to mount the Ubuntu 22.04 ISO by clicking Optical Drive under storage
![](https://www.ryandoyon.com/wp-content/uploads/2022/04/VirtualBox-optical-drive-1024x598.jpg)
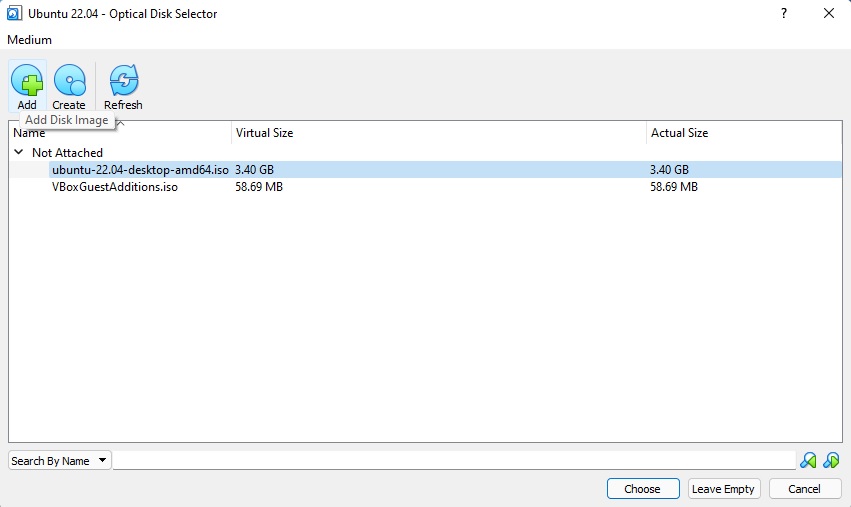
- Choose/Create a disk image
![](https://www.ryandoyon.com/wp-content/uploads/2022/04/VirtualBox-choose-a-disk-image-1-1024x597.jpg)
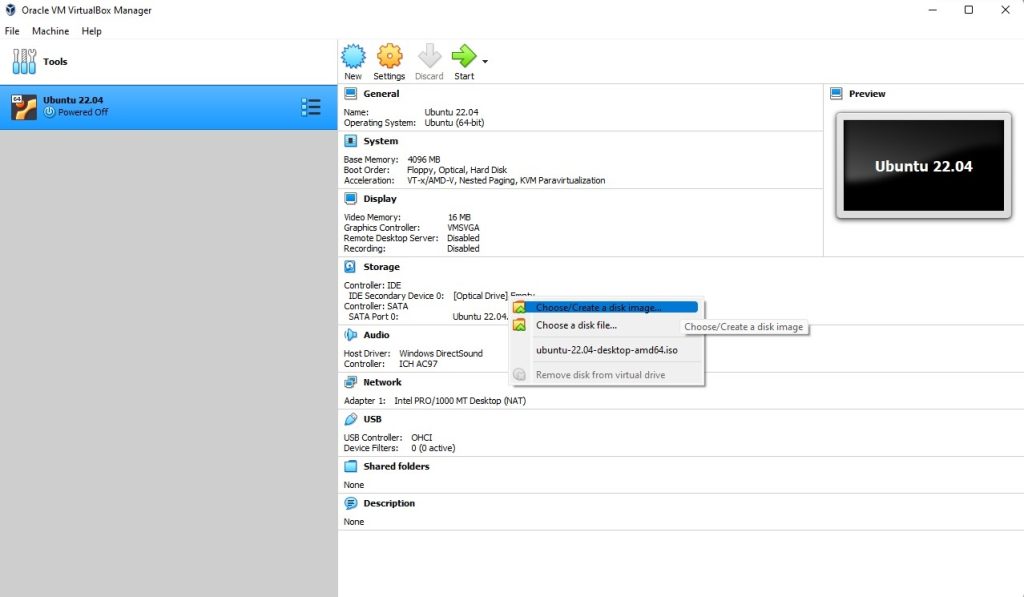
- Add the Ubuntu 22.04 ISO and click choose
![](https://www.ryandoyon.com/wp-content/uploads/2022/04/VirtualBox-add-iso-1.jpg)
- You can now start the VM and begin the OS install process
![](https://www.ryandoyon.com/wp-content/uploads/2022/04/VirtualBox-start-VM-1024x599.jpg)
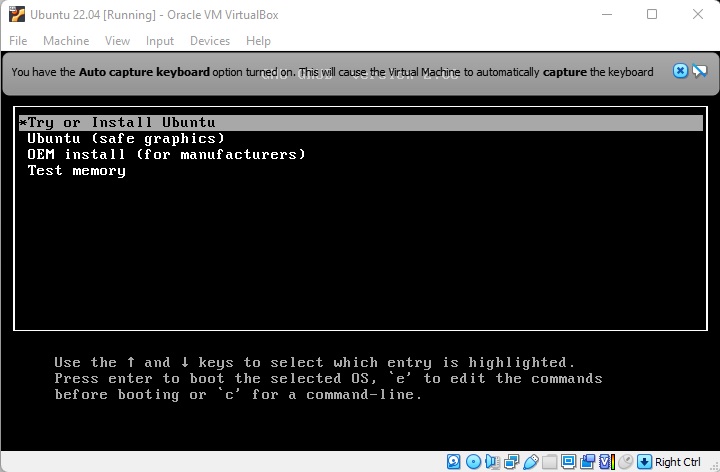
- From the boot menu choose Try or Install Ubuntu
![](https://www.ryandoyon.com/wp-content/uploads/2022/04/VirtualBox-install-ubuntu.jpg)
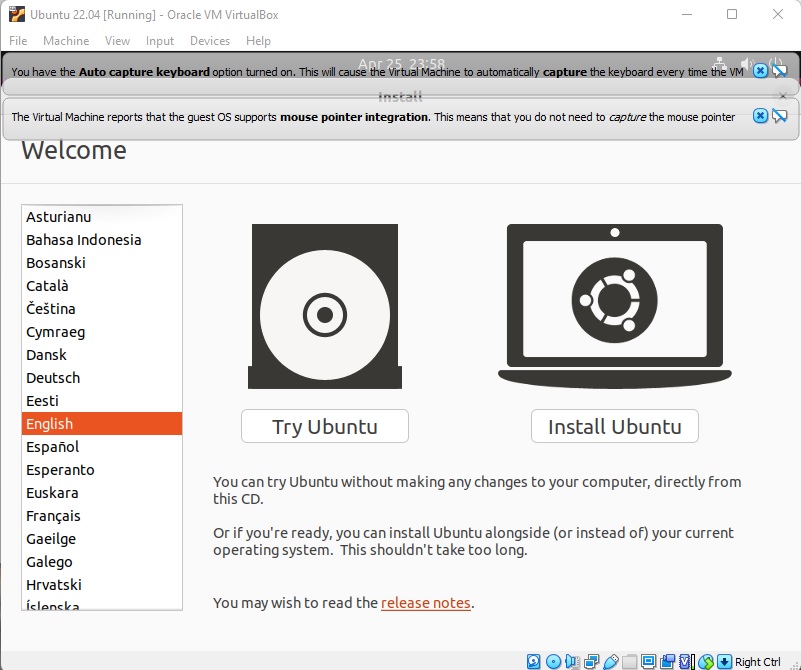
- On the welcome screen choose your language and click install Ubuntu
![](https://www.ryandoyon.com/wp-content/uploads/2022/04/VirtualBox-Welcome-screen.jpg)
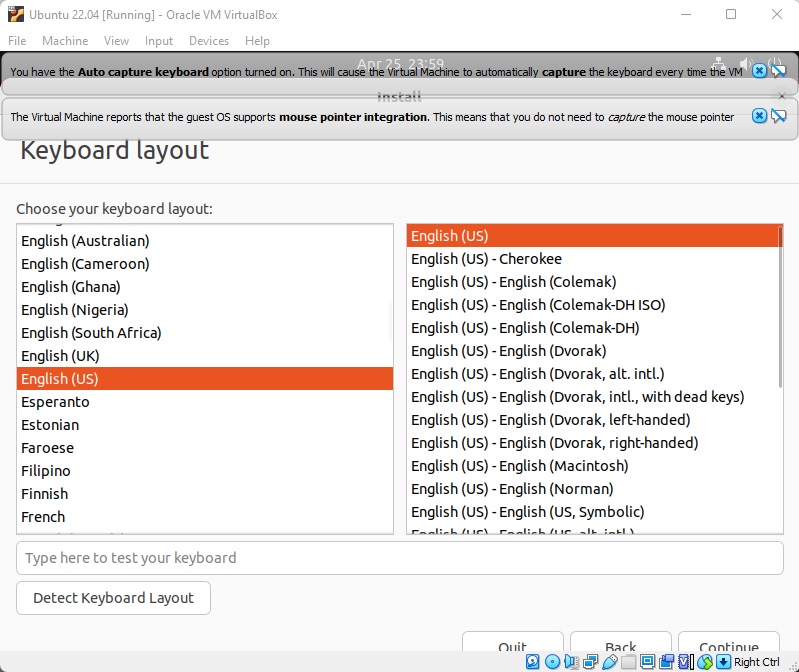
- Choose your keyboard layout and click continue
![](https://www.ryandoyon.com/wp-content/uploads/2022/04/VirtualBox-Keyboard-layout.jpg)
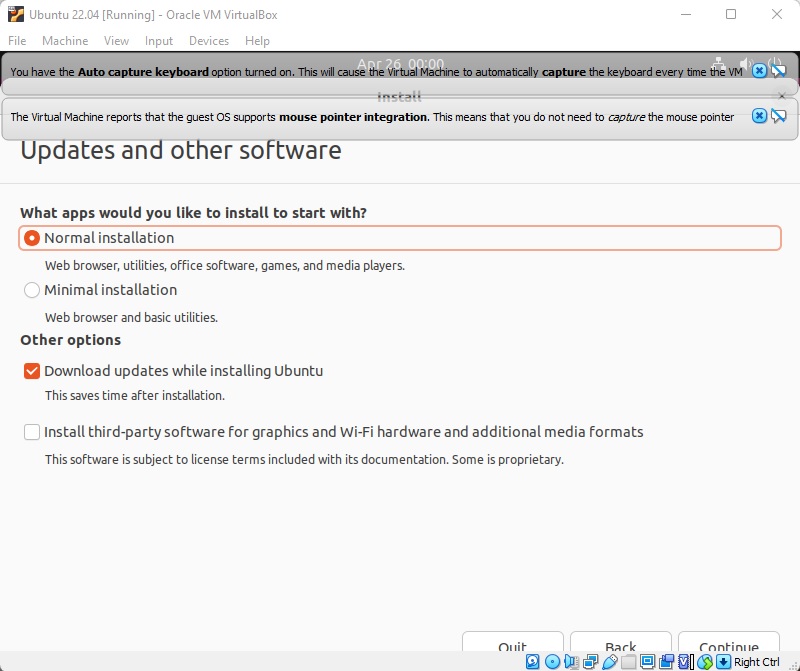
- Choose Normal Installation or Minimal based on your needs and also Download updates while installing Ubuntu
![](https://www.ryandoyon.com/wp-content/uploads/2022/04/VirtualBox-normal-installation.jpg)
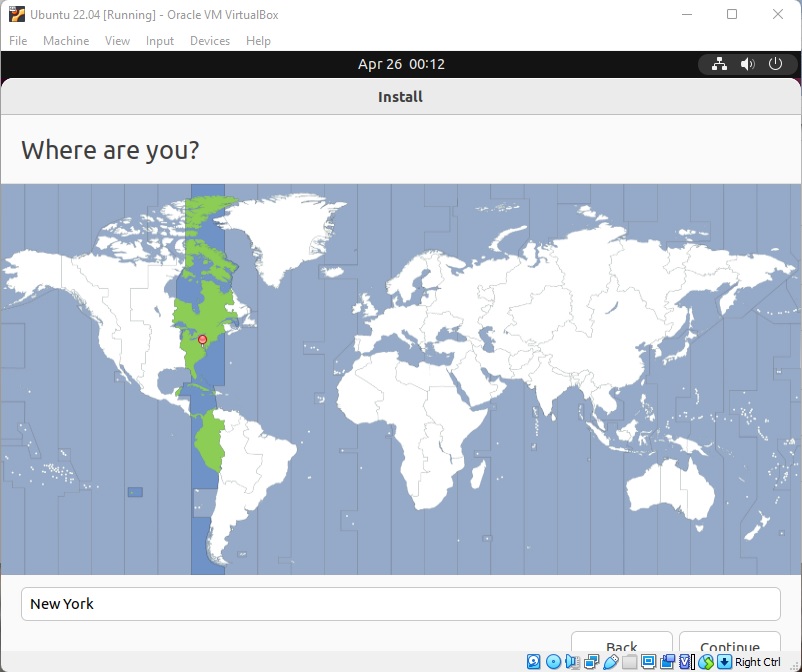
- Choose your time zone and click Continue
![](https://www.ryandoyon.com/wp-content/uploads/2022/04/VirtualBox-time-zone.jpg)
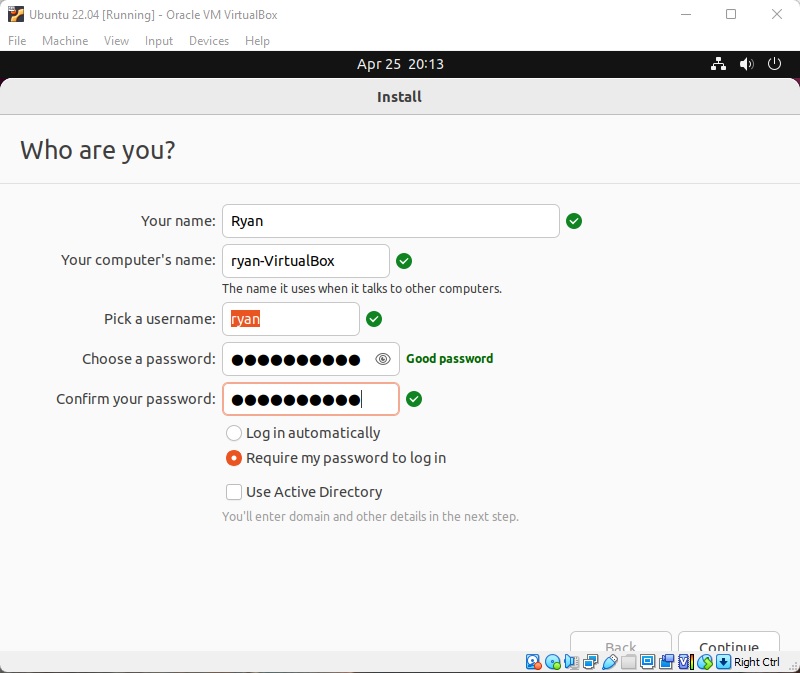
- Set up your account information by filling out name, username, and password
![](https://www.ryandoyon.com/wp-content/uploads/2022/04/VirtualBox-account-setup.jpg)
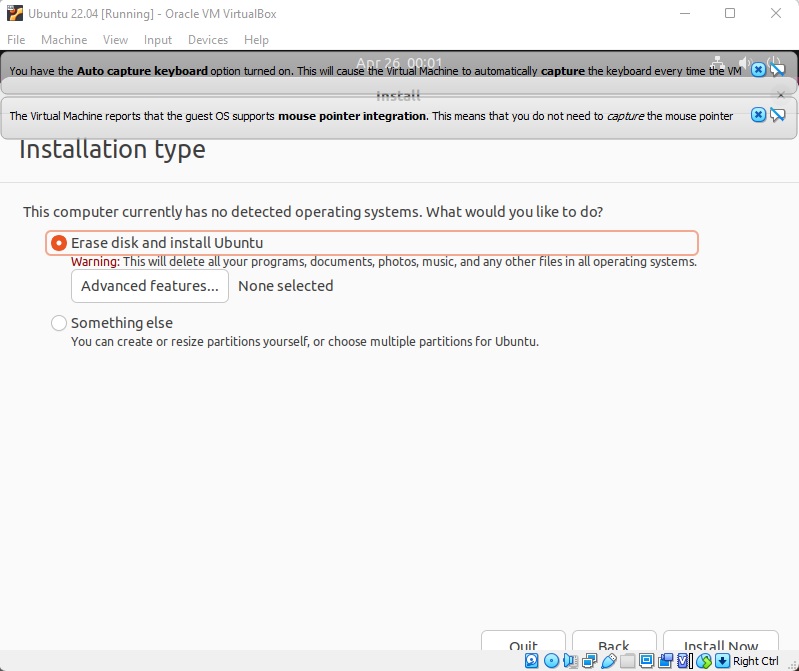
- Choose Erase disk and install Ubuntu and click Install Now
![](https://www.ryandoyon.com/wp-content/uploads/2022/04/VirtualBox-Installation-type.jpg)
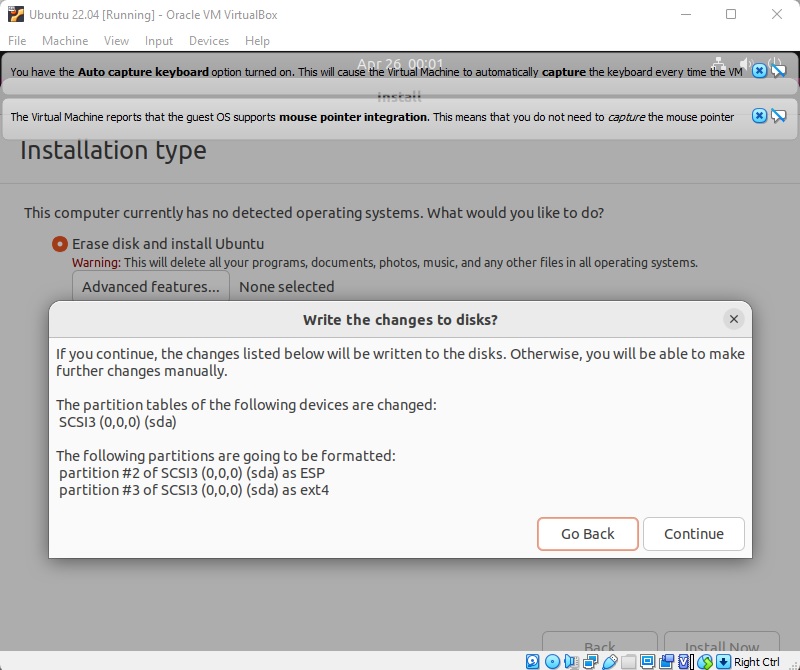
- Click Continue to write the changes to disk
![](https://www.ryandoyon.com/wp-content/uploads/2022/04/VirtualBox-partition-tables.jpg)
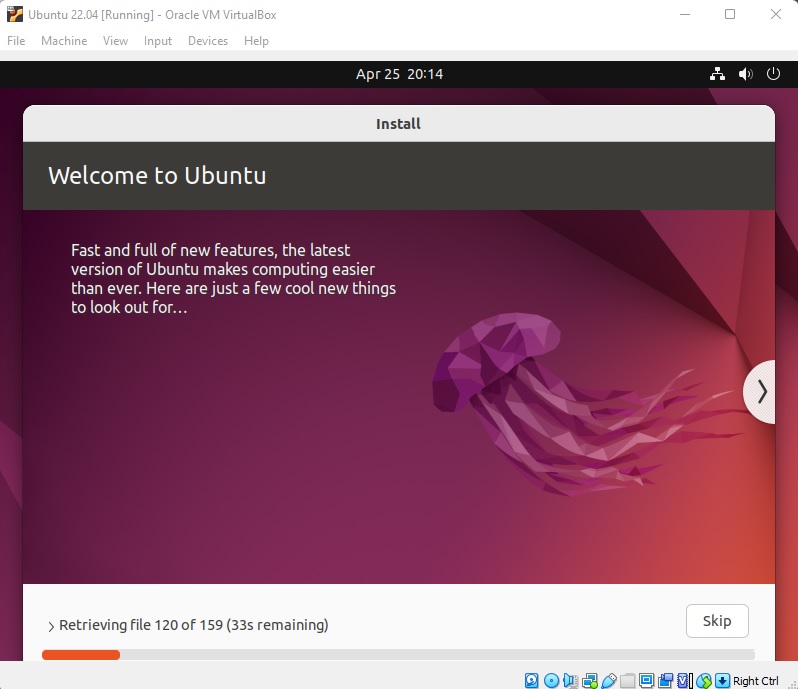
- At this point the OS install process should begin
![](https://www.ryandoyon.com/wp-content/uploads/2022/04/VirtualBox-installing-screen.jpg)
- Upon completion of the OS install you will need to reboot
![](https://www.ryandoyon.com/wp-content/uploads/2022/04/VirtualBox-reboot-after-install.jpg)
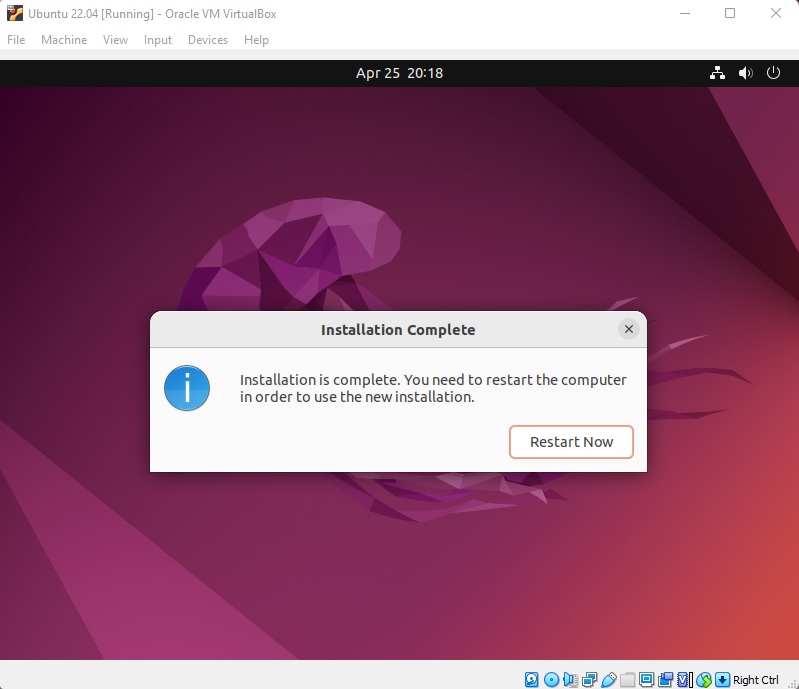
- Congratulations you have now installed Ubuntu 22.04 on VirtualBox! After reboot you should be able to log in with the credentials you set up in the above account creation.